


Schutt Log Homes
& Mill Works

Stacking Oak Logs: A Step-by-Step Adventure in Building Your Dream Log Home
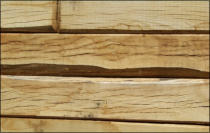
At Schutt Log Homes and Mill Works, we build with solid oak—either 6” x 8” or 4” x 8” rectangular logs in lengths ranging
from 8 to 20 feet. These beautiful oak logs are the heart and soul of your log home, and stacking them is where the real
fun begins!
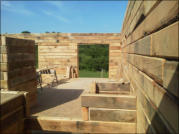
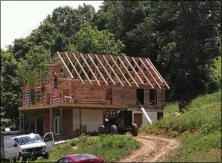
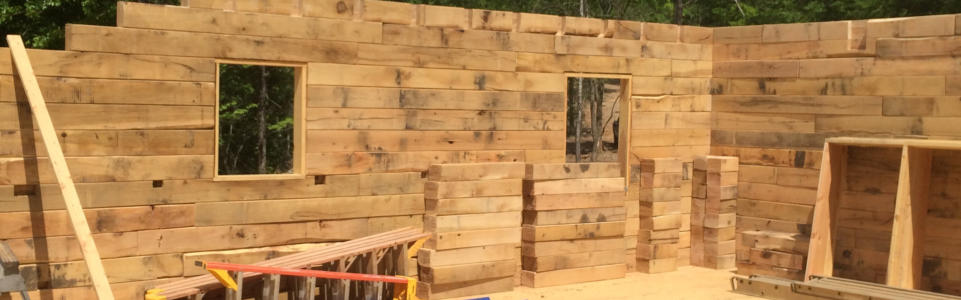
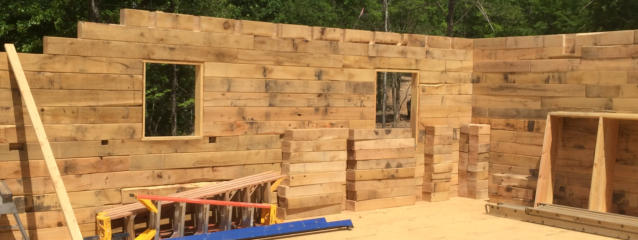
Building your log walls is more than just construction—it’s a journey. With every log you stack, your home starts to take
shape. You’ll begin to see the character of your cabin emerge, course by course, until the dream you’ve been imagining is
standing tall in front of you.
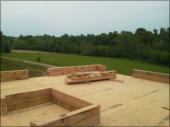
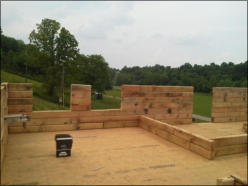
It All Starts with the First Course
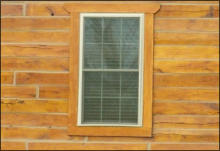
The most important step is laying out that very first row of logs. Take your time here—this is the foundation of everything to
come. Double-check your measurements, mark all your door openings, and make sure those logs aren’t crossing over where
your doors will go. Openings should be the right size to fit your door frames and allow for a smooth install.
Make sure your first course is level—this can’t be stressed enough. An electric planer will come in handy here to
flatten any high spots.
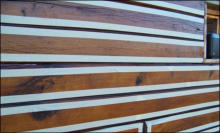
Chamfer, Chink, and Secure
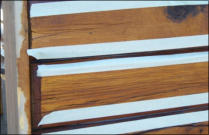
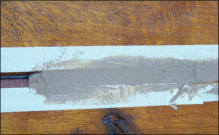
Before stacking, each log is chamfered on the edges—this means we shave a small angle off each corner. This not only
gives a finished look but also makes room for backer rod and chinking, which will later seal the walls and add insulation.
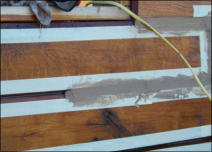
To anchor the first course, we run J-bolts through the sill plate into the foundation. After that, logs are stacked and secured
with TimberLOK screws every 3 feet or so. Be sure to pre-drill using a countersink bit so the screw heads sit below the log
surface—this keeps everything level for the next course and avoids any snagging when you go to plane the walls.
Pro Tips for Stacking Success
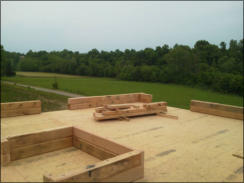
A great tip: set up temporary corner braces using 2x4s or 2x6s inside each corner. Attach them to the subfloor to keep your
corners square and your logs aligned as you stack.
Once you're on the second course, it's a good time to plan your electrical layout. You can cut out spaces for outlets and
switches using a paddle bit and chisel. Run your wiring through a groove in the top center of the logs and tuck wires behind
door frames as needed.
As each log goes up, check it with a level—both horizontally and vertically. As the wall grows taller, use a longer level to make
sure it’s not drifting in or out.
Each log gets planed on the top and bottom for a smooth, even fit. And if a log has a slight bow or twist (which is totally
normal), just use a shim to help it sit right.
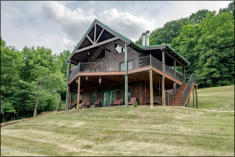
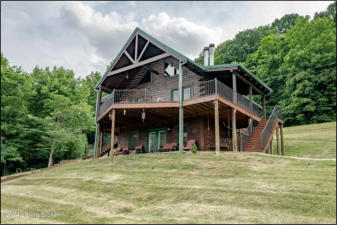
Turning a Stack of Logs into a Timeless Home
Course by course, your walls rise—and with them, the dream becomes real. It’s a process full of pride, patience, and
craftsmanship. And in the end, you'll have a home built from real oak, made to last for generations.
Need help along the way? That’s what we’re here for. At Schutt Log Homes and Mill Works, we love helping folks bring
their log home dreams to life—one beautiful oak log at a time.


Stacking Oak Logs: A Step-by-Step Adventure in Building Your Dream Log Home
At Schutt Log Homes and Mill Works, we build with solid oak—either 6” x 8” or 4” x 8” rectangular logs in lengths ranging
from 8 to 20 feet. These beautiful oak logs are the heart and soul of your log home, and stacking them is where the real
fun begins!
Building your log walls is more than just construction—it’s a journey. With every log you stack, your home starts to take
shape. You’ll begin to see the character of your cabin emerge, course by course, until the dream you’ve been imagining is
standing tall in front of you.
It All Starts with the First Course
The most important step is laying out that very first row of logs. Take your time here—this is the foundation of everything to
come. Double-check your measurements, mark all your door openings, and make sure those logs aren’t crossing over where
your doors will go. Openings should be the right size to fit your door frames and allow for a smooth install.
Make sure your first course is level—this can’t be stressed enough. An electric planer will come in handy here to
flatten any high spots.
Chamfer, Chink, and Secure
Before stacking, each log is chamfered on the edges—this means we shave a small angle off each corner. This not only
gives a finished look but also makes room for backer rod and chinking, which will later seal the walls and add insulation.
To anchor the first course, we run J-bolts through the sill plate into the foundation. After that, logs are stacked and secured
with TimberLOK screws every 3 feet or so. Be sure to pre-drill using a countersink bit so the screw heads sit below the log
surface—this keeps everything level for the next course and avoids any snagging when you go to plane the walls.
Pro Tips for Stacking Success
A great tip: set up temporary corner braces using 2x4s or 2x6s inside each corner. Attach them to the subfloor to keep your
corners square and your logs aligned as you stack.
Once you're on the second course, it's a good time to plan your electrical layout. You can cut out spaces for outlets and
switches using a paddle bit and chisel. Run your wiring through a groove in the top center of the logs and tuck wires behind
door frames as needed.
As each log goes up, check it with a level—both horizontally and vertically. As the wall grows taller, use a longer level to make
sure it’s not drifting in or out.
Each log gets planed on the top and bottom for a smooth, even fit. And if a log has a slight bow or twist (which is totally
normal), just use a shim to help it sit right.
Turning a Stack of Logs into a Timeless Home
Course by course, your walls rise—and with them, the dream becomes real. It’s a process full of pride, patience, and
craftsmanship. And in the end, you'll have a home built from real oak, made to last for generations.
Need help along the way? That’s what we’re here for. At Schutt Log Homes and Mill Works, we love helping folks bring
their log home dreams to life—one beautiful oak log at a time.